Getting Started
This guide walks you through setting up Kernl from scratch. From installation to seeing your ingredients live on your storefront, you should be up and running in under 10 minutes.
Theme Compatibility: Kernl requires an Online Store 2.0 theme. If you are unsure whether your theme qualifies, check with your theme developer or look for themes launched after 2021 (Dawn, Refresh, Sense, Craft, etc.).
Step 1 — Create your first ingredient
Navigate to the Ingredients page using the sidebar.
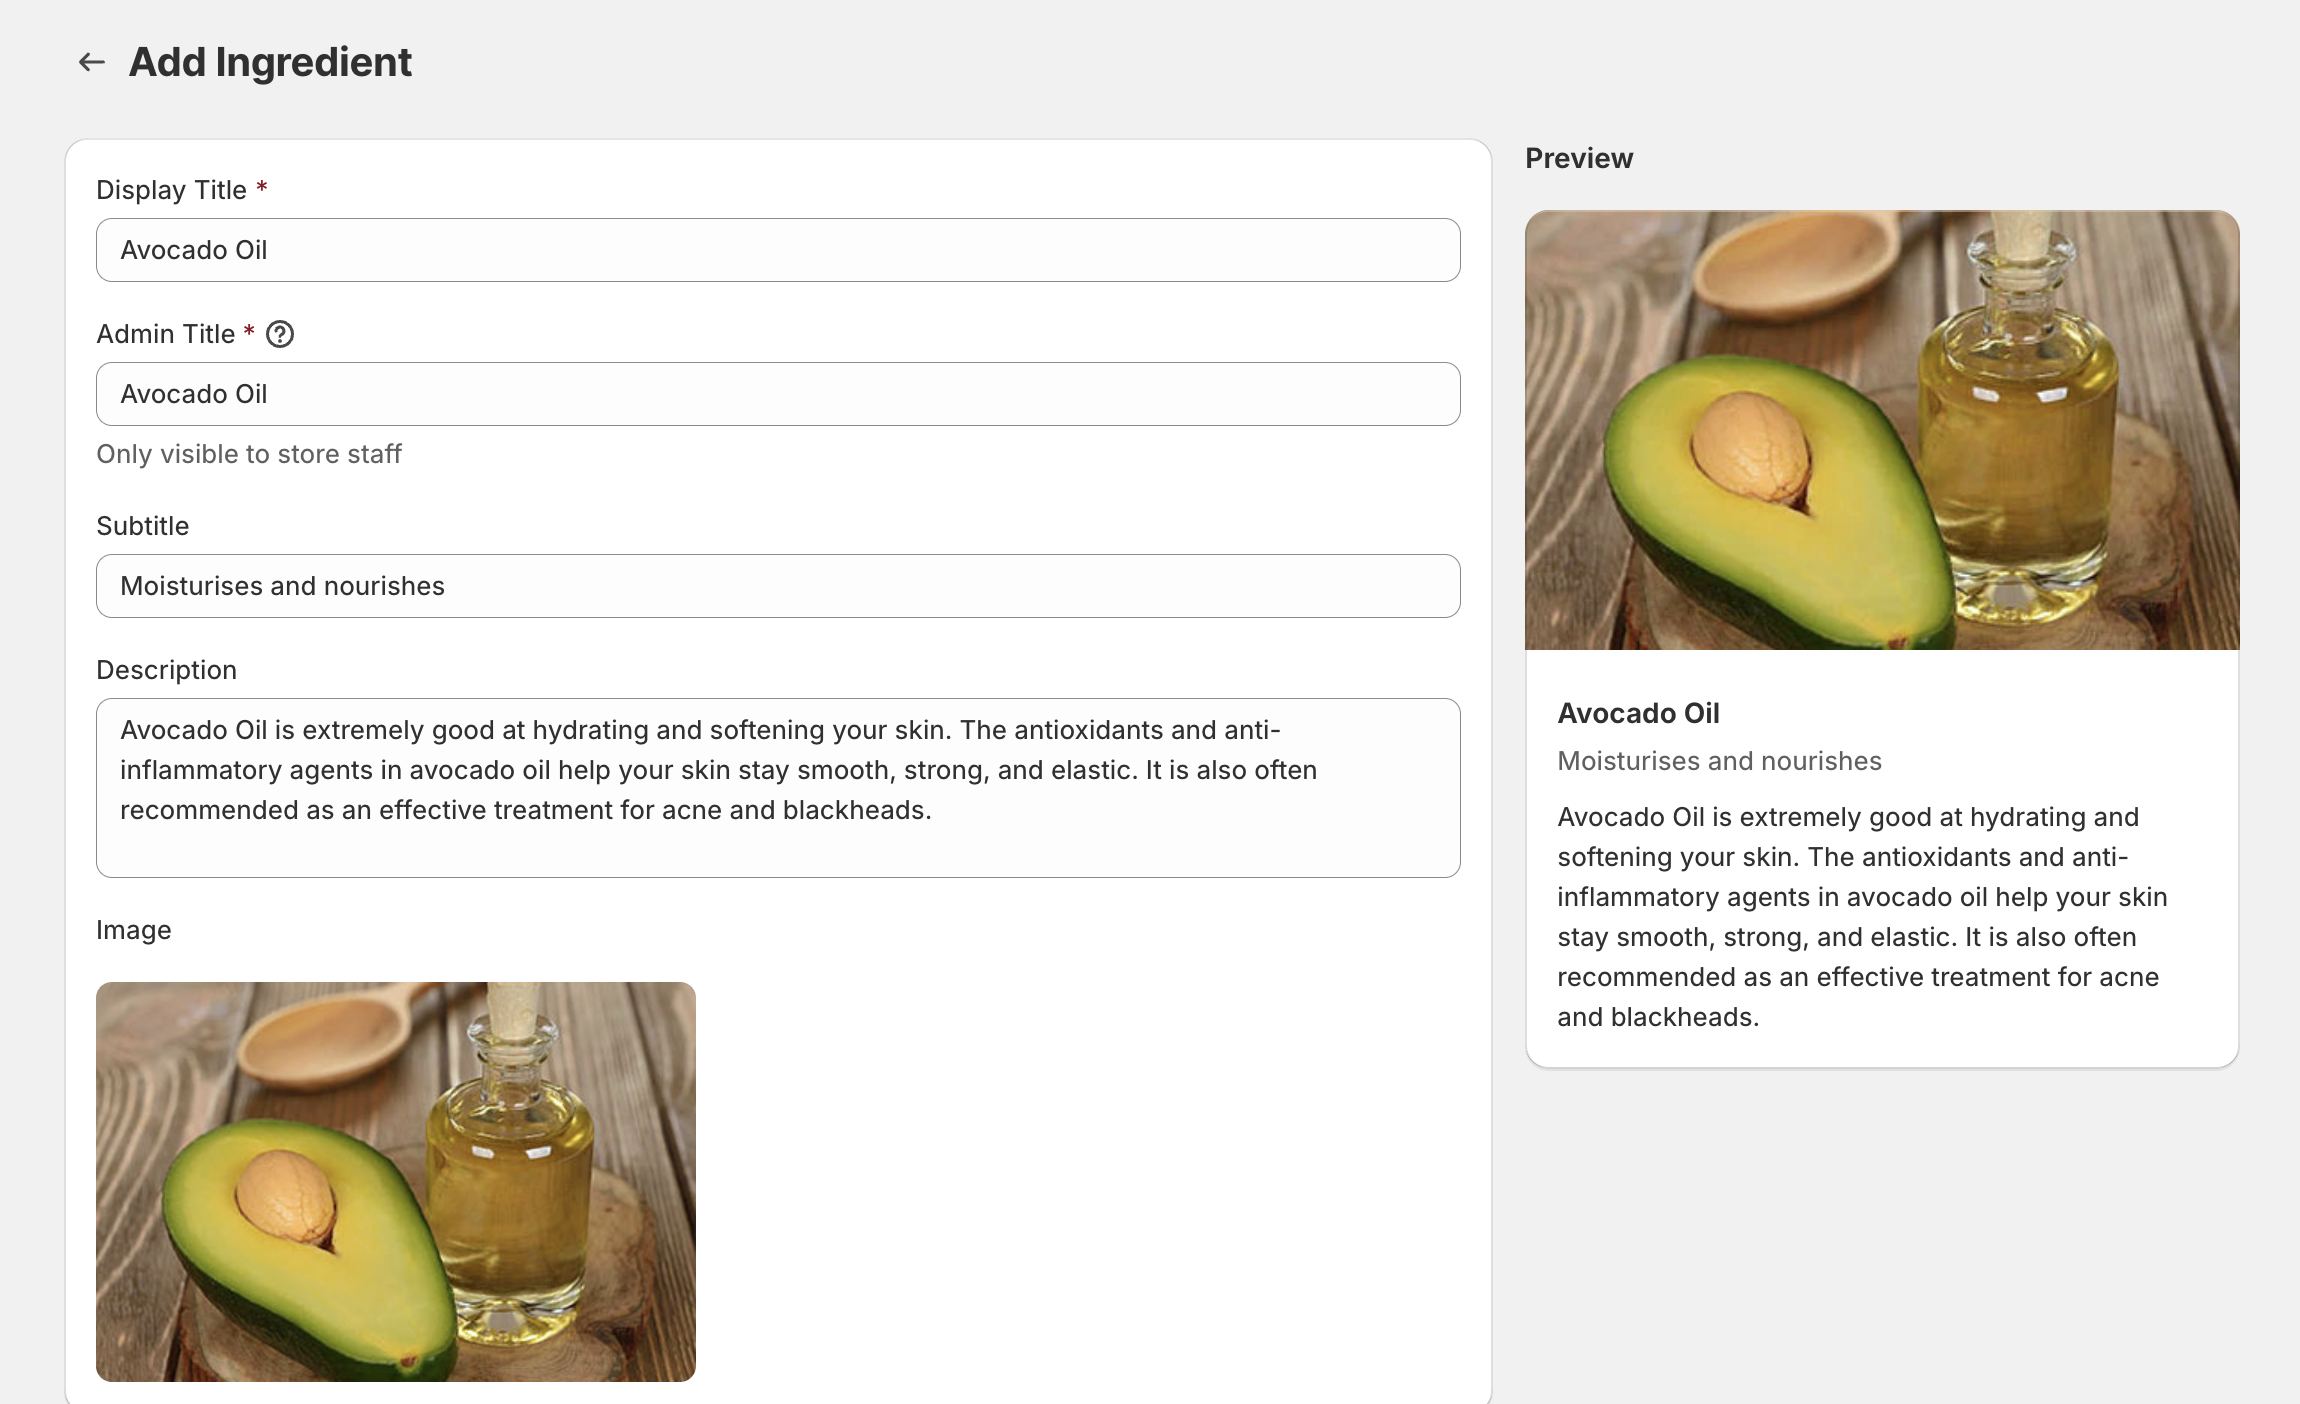
Click Create Ingredient and fill in the details:
- Admin Title (required) — This is for your reference only and won’t be shown to customers. Use something descriptive like “Shea Butter” or “Vitamin C”.
- Display Title — The name shown to customers on your storefront.
- Subtitle — A short tagline or category for the ingredient.
- Description — A longer explanation of what the ingredient is or does.
- Image — Upload an image to represent the ingredient. This will be displayed alongside the ingredient on your product pages.
Click Save when you’re done. You can always come back to edit these details later.
Repeat this step for each ingredient you want to use. Don’t worry about getting everything perfect — any edits you make later will automatically update across all products using that ingredient.
Bulk import: If you already have a spreadsheet of ingredients, use Import CSV on the Ingredients page to add up to 100 at once. See Managing Your Ingredient Library for the required columns and file format.
Step 2 — Assign ingredients to a product
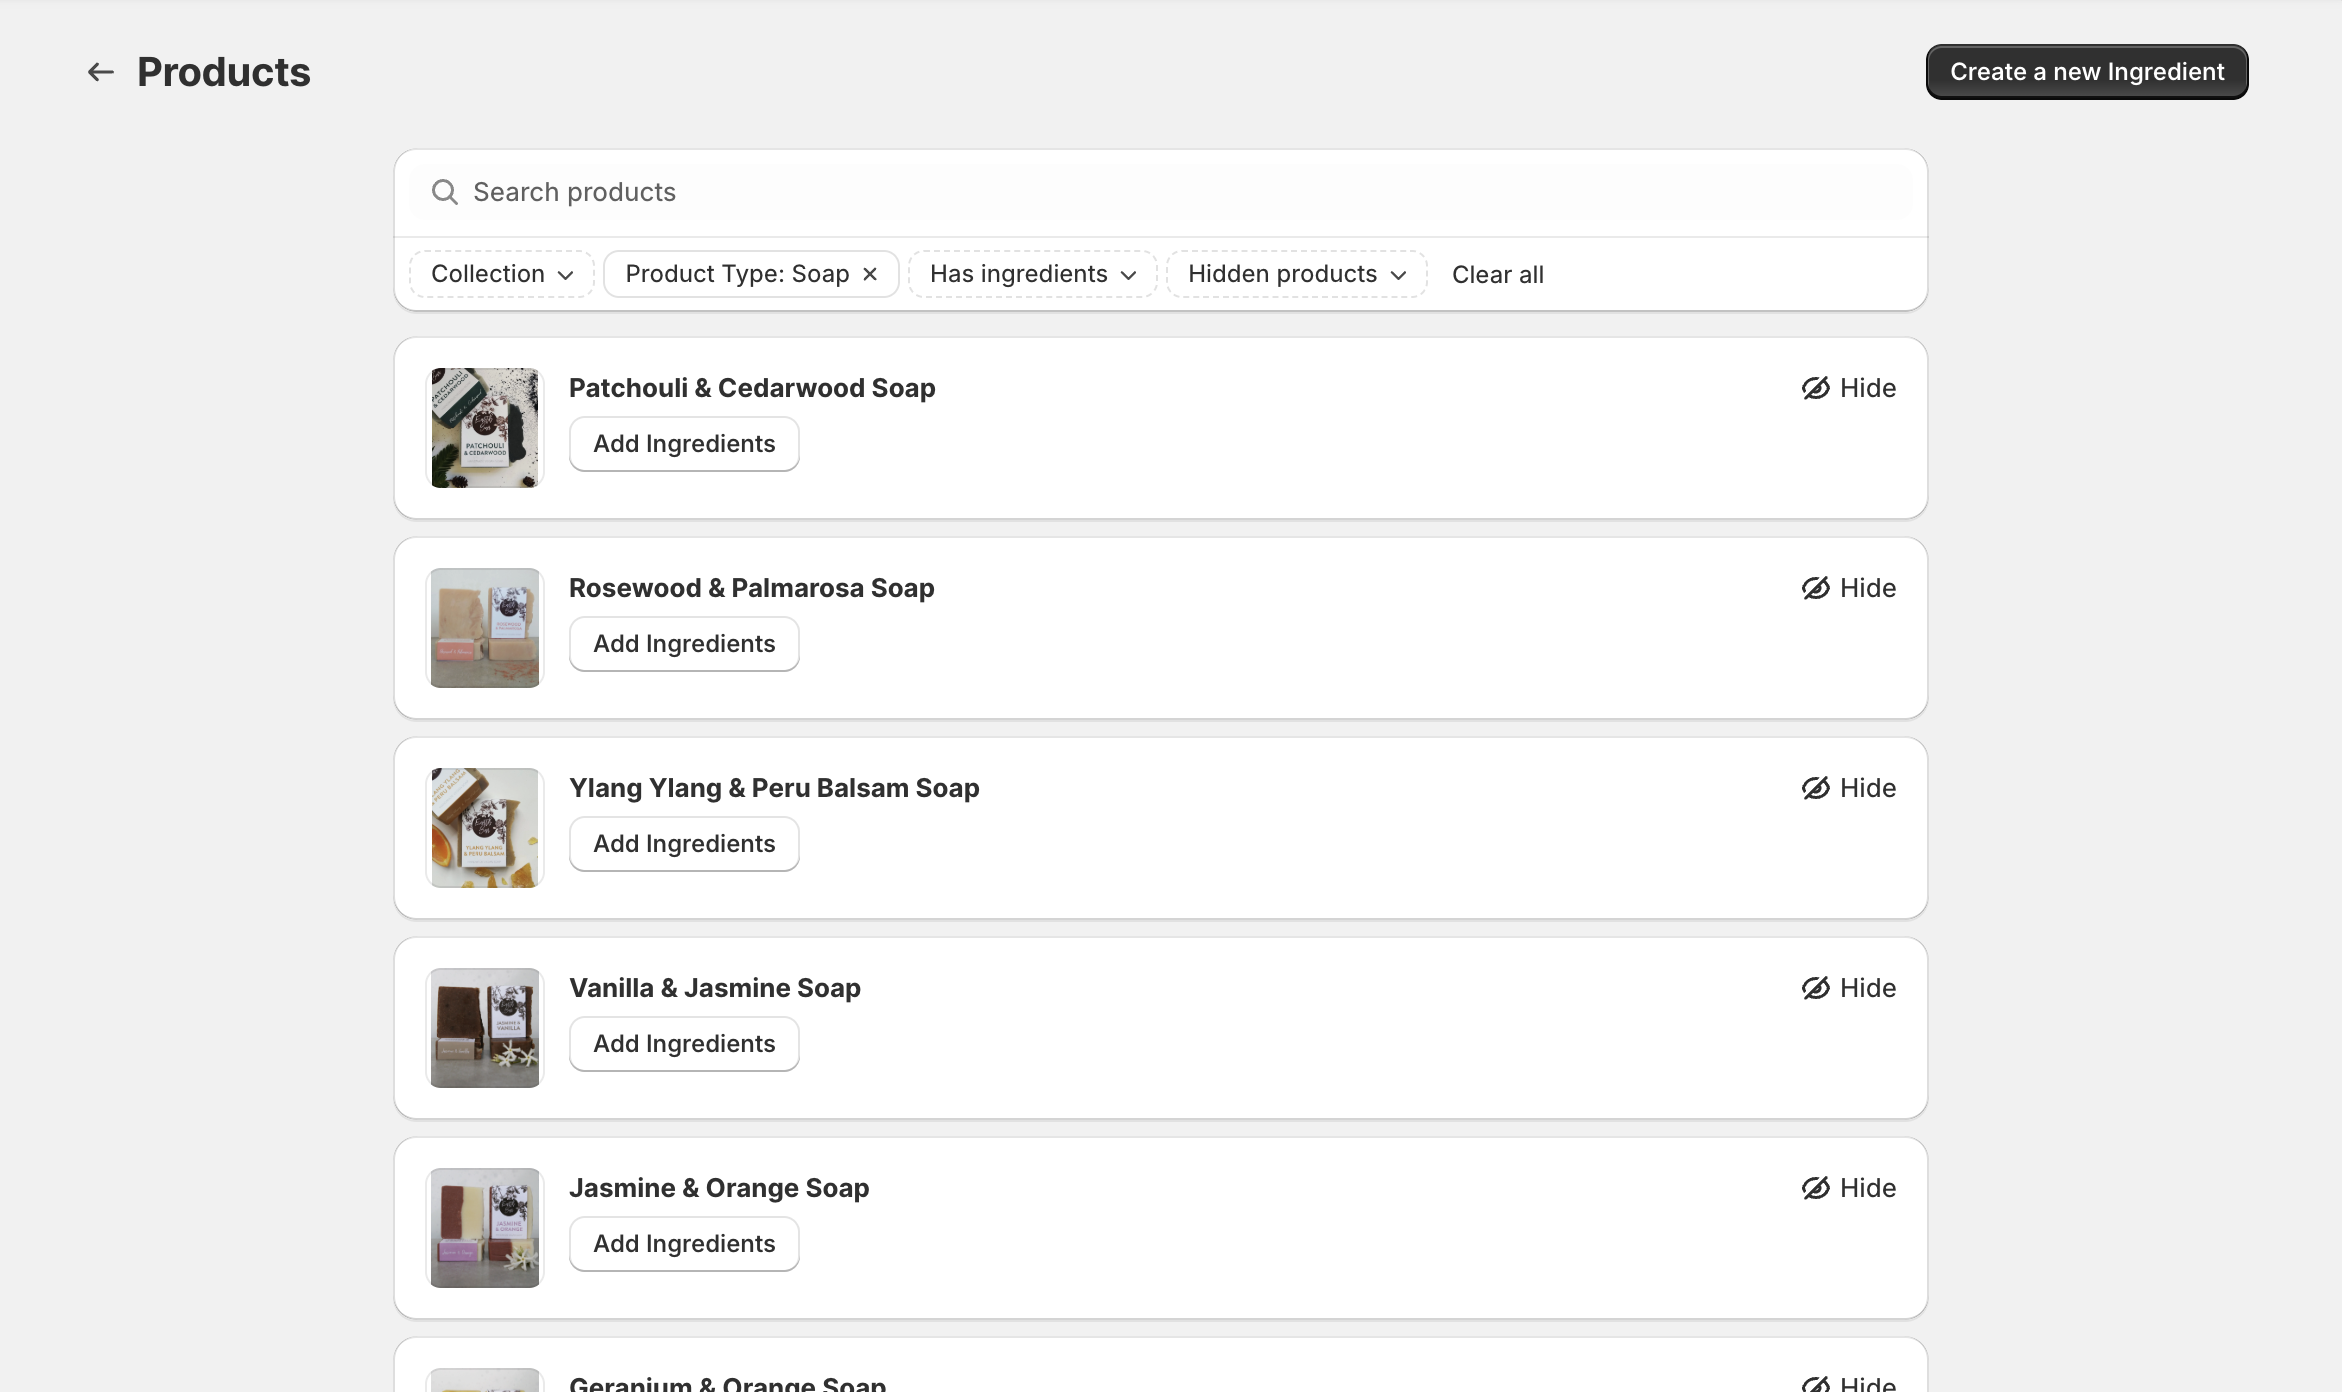
Navigate to the Products page using the sidebar. You’ll see a list of all your Shopify products.
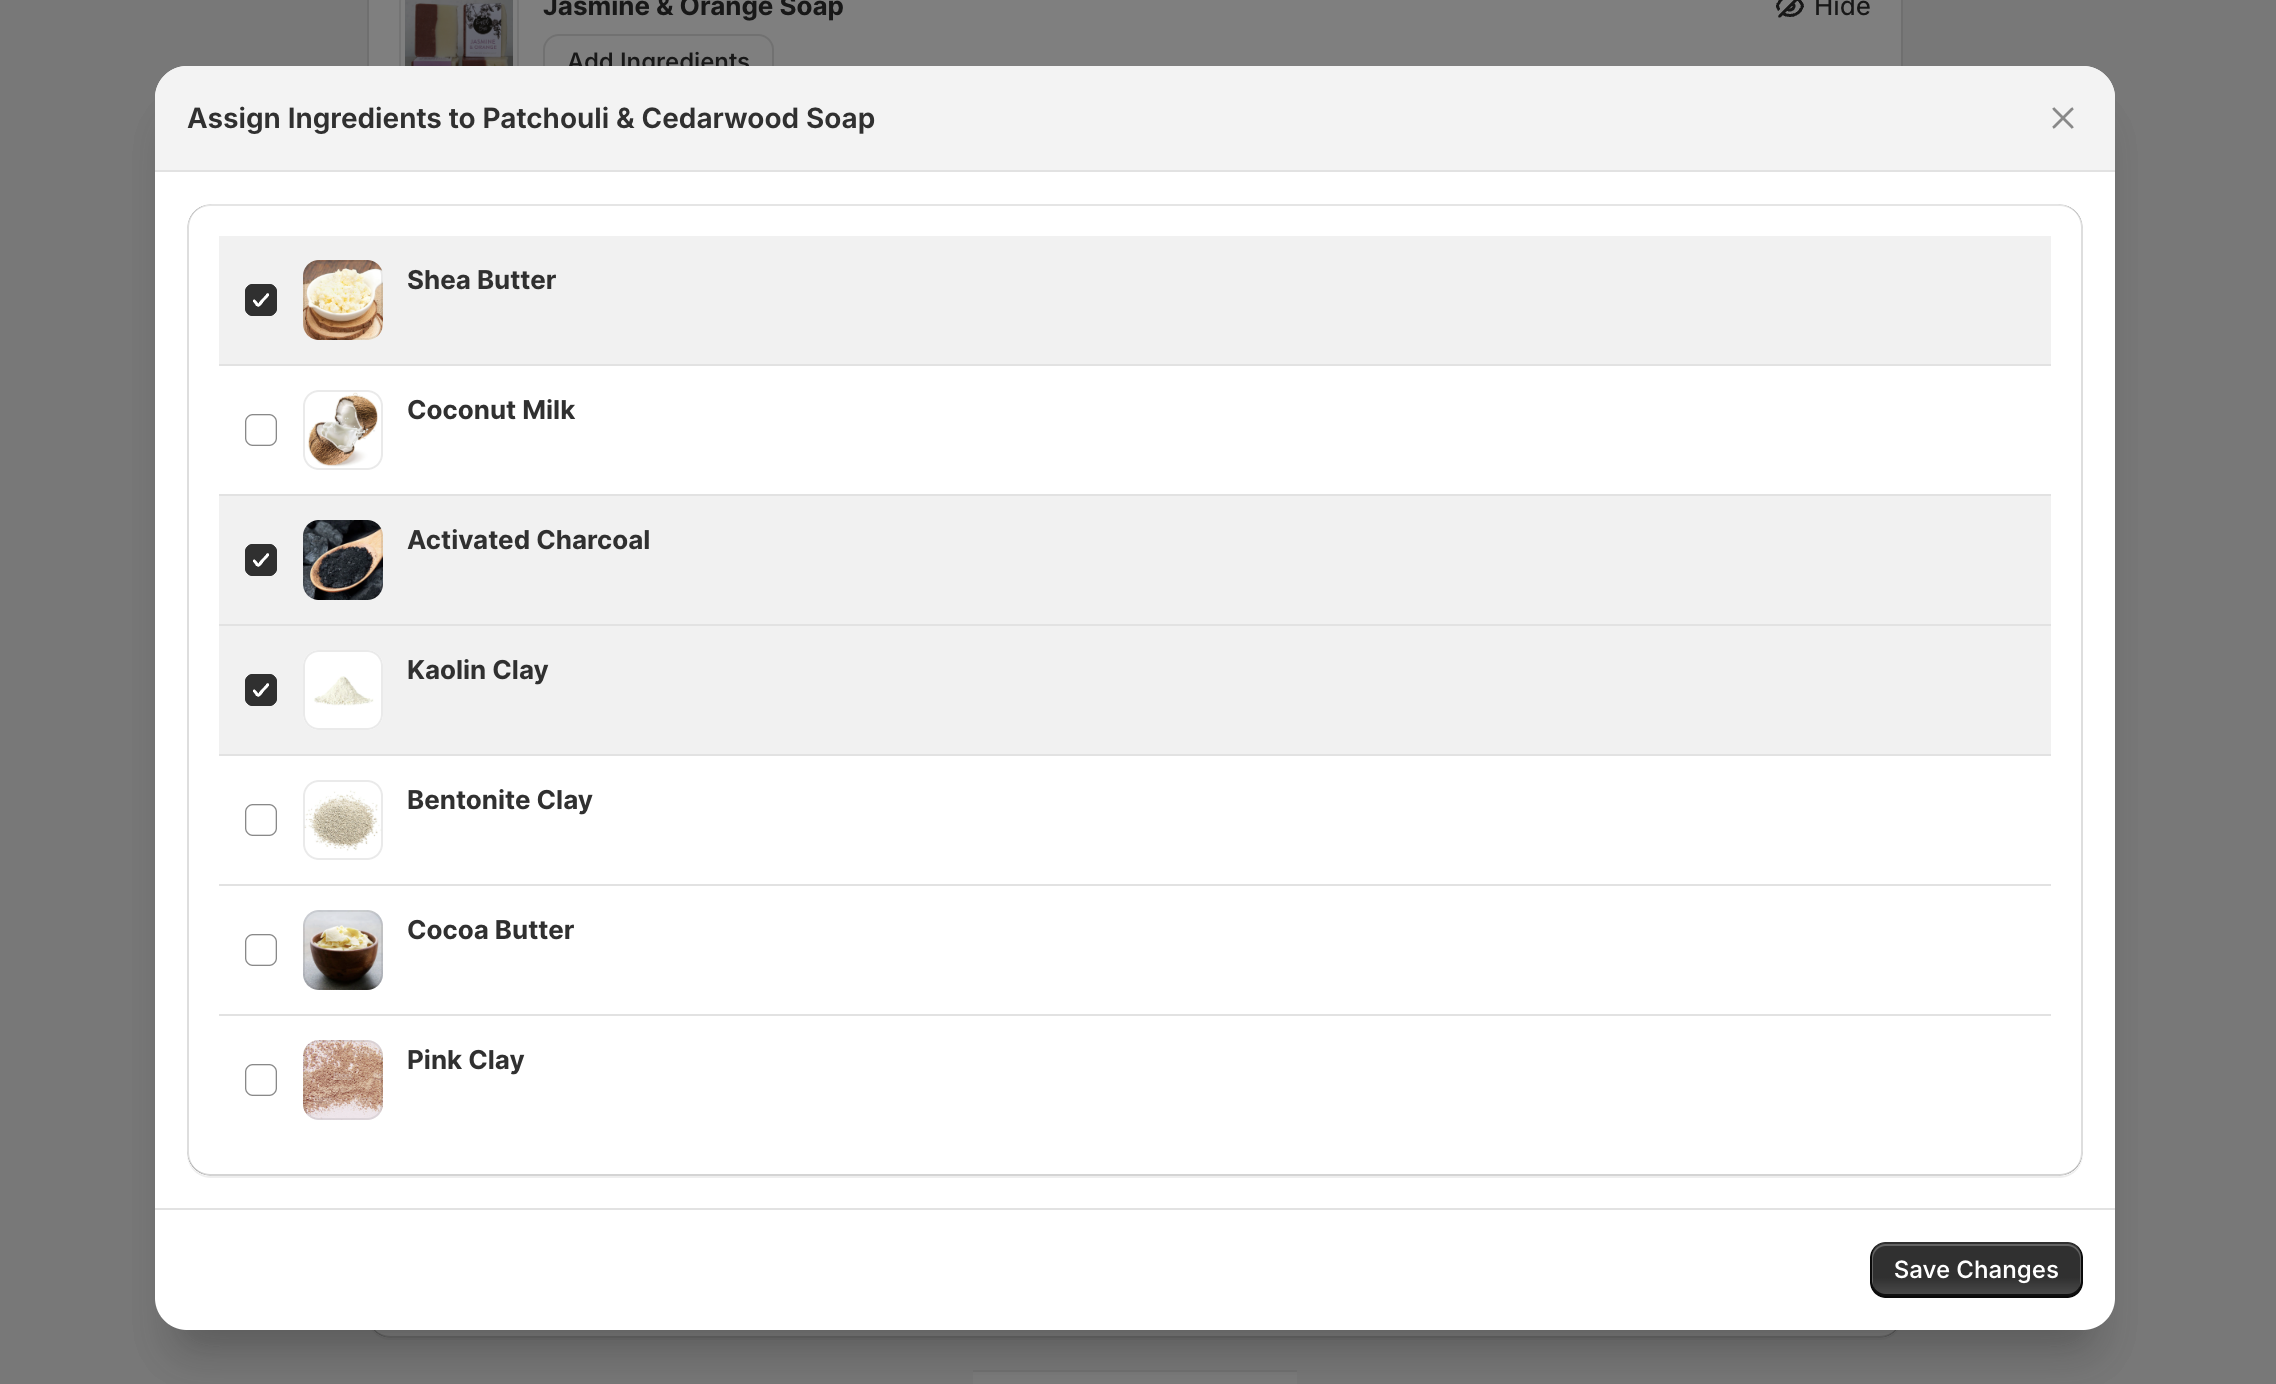
Find the product you want to add ingredients to and click Add Ingredients. A modal will open showing your full ingredient library. Select one or more ingredients and click Save Changes.
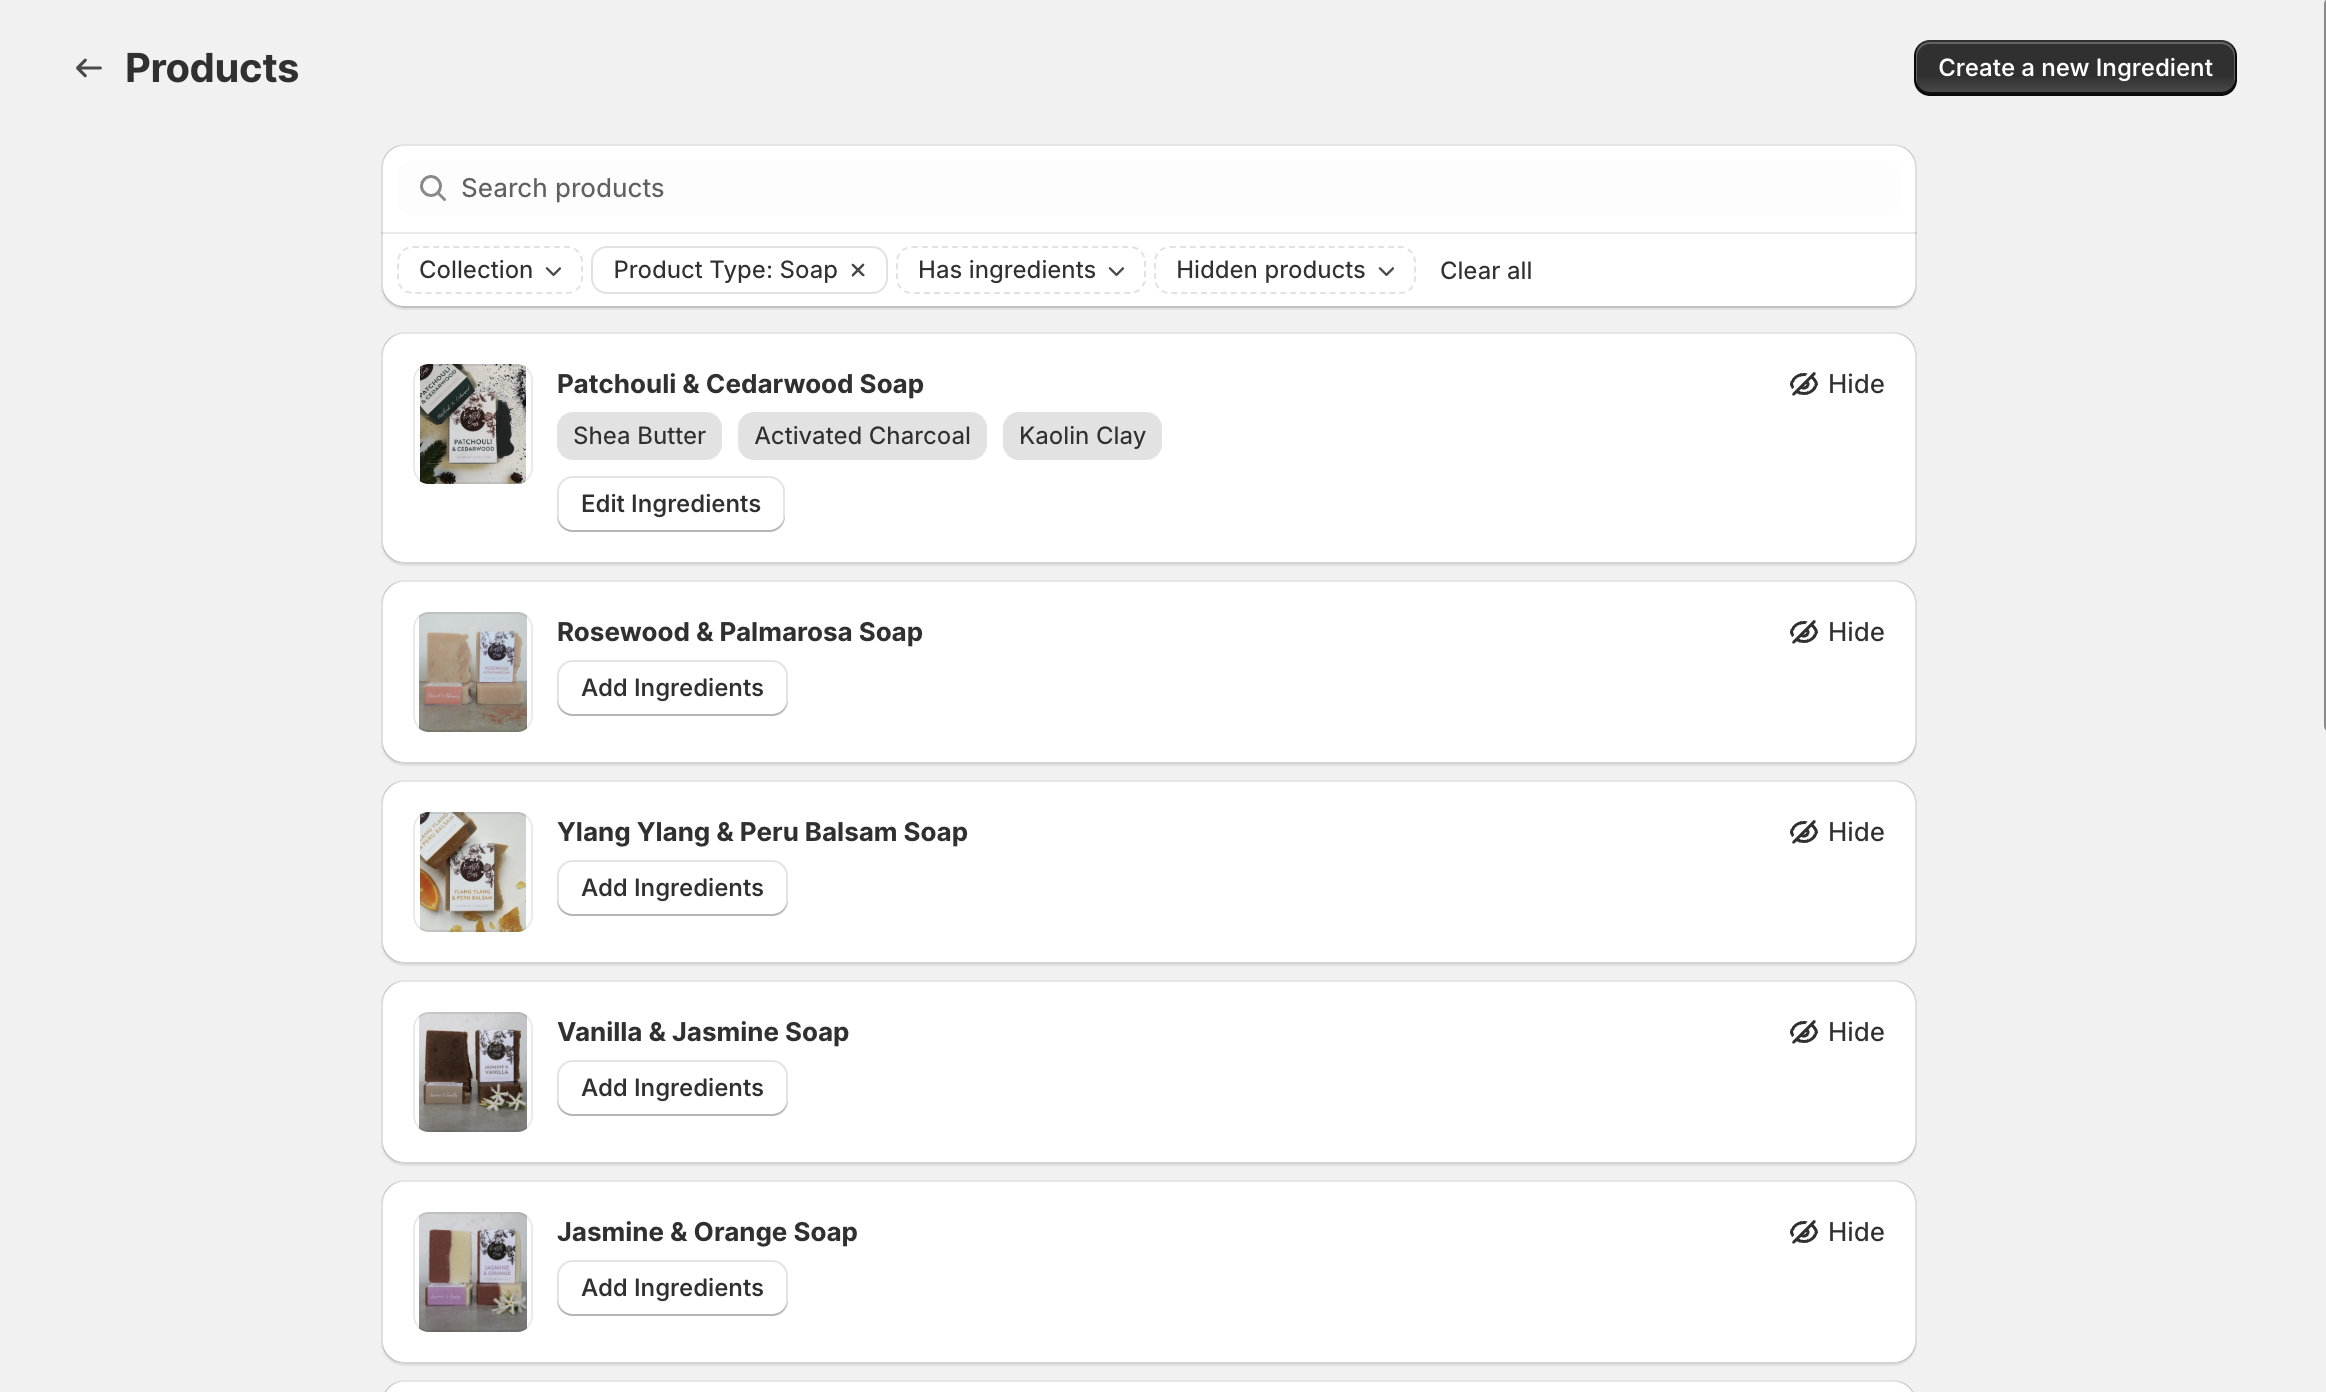
The ingredients will appear as tags on the product row. You can repeat this for as many products as you like.
You can also assign ingredients without leaving the product in Shopify admin — add the Kernl Ingredients block on the product page and use Edit ingredients. See Assigning from the Shopify product page.
Step 3 — Add the theme block to your product template
This is the step that makes ingredients visible to your customers. Kernl works through a Shopify theme app block, which you need to add to your product page template once.
- From the dashboard click on the Open theme editor button
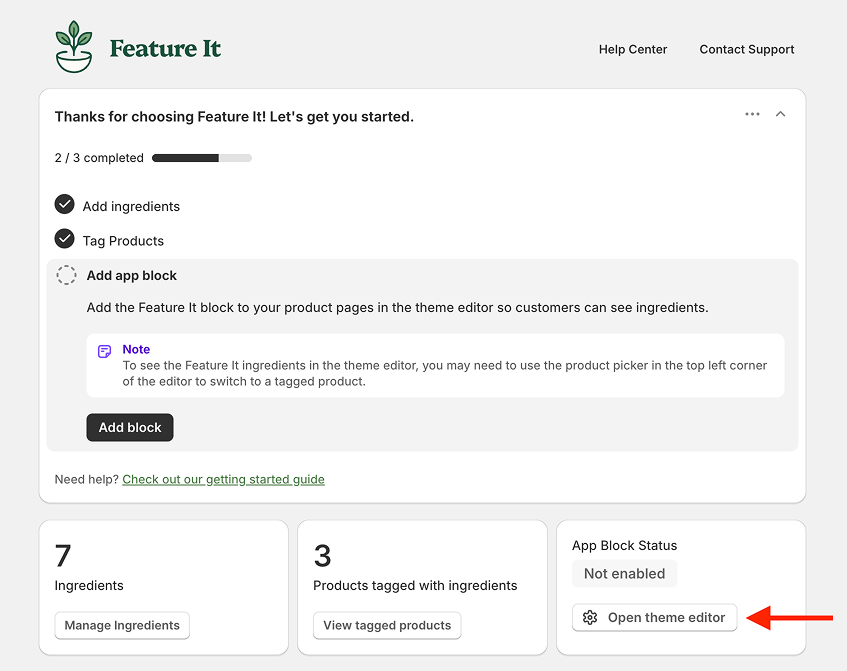
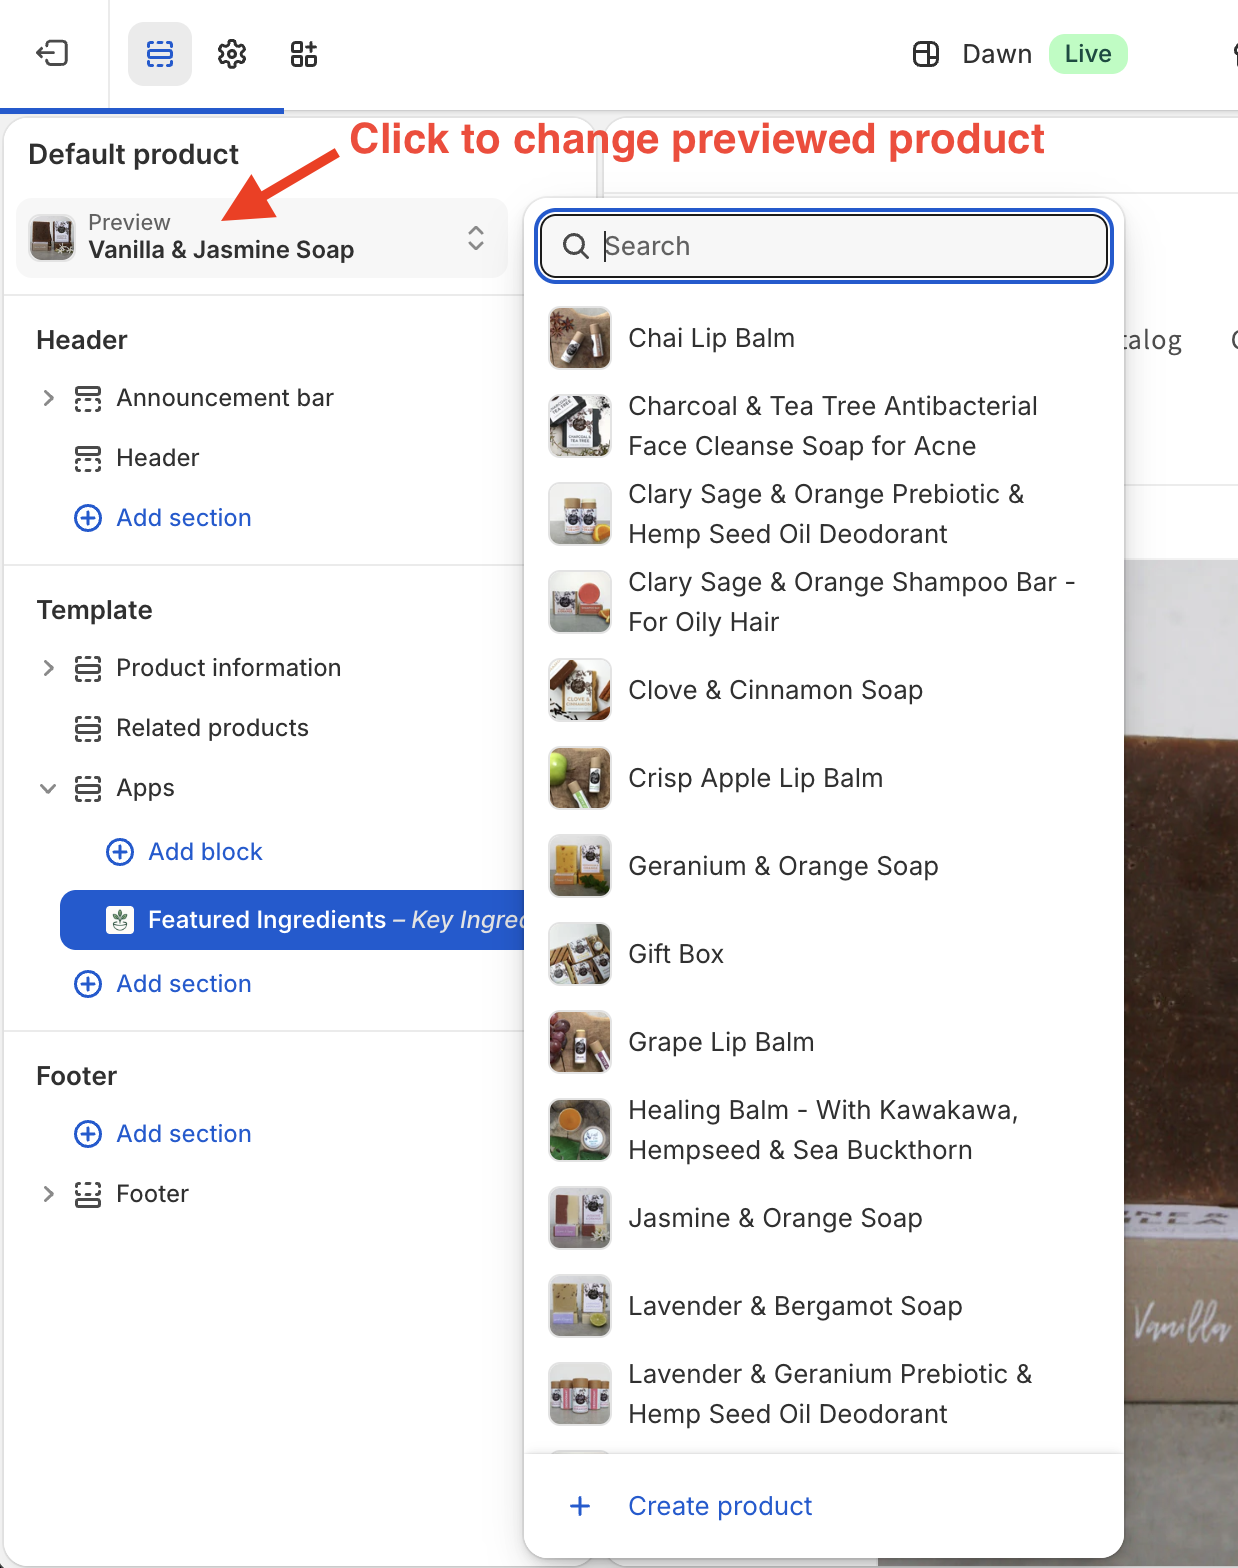
- You may see a message saying ‘No ingredients found for this product’

If so you can change the product previewed by clicking on the Product dropdown in the top left corner and selecting a different product. Select a product that you have ingredients assigned to.
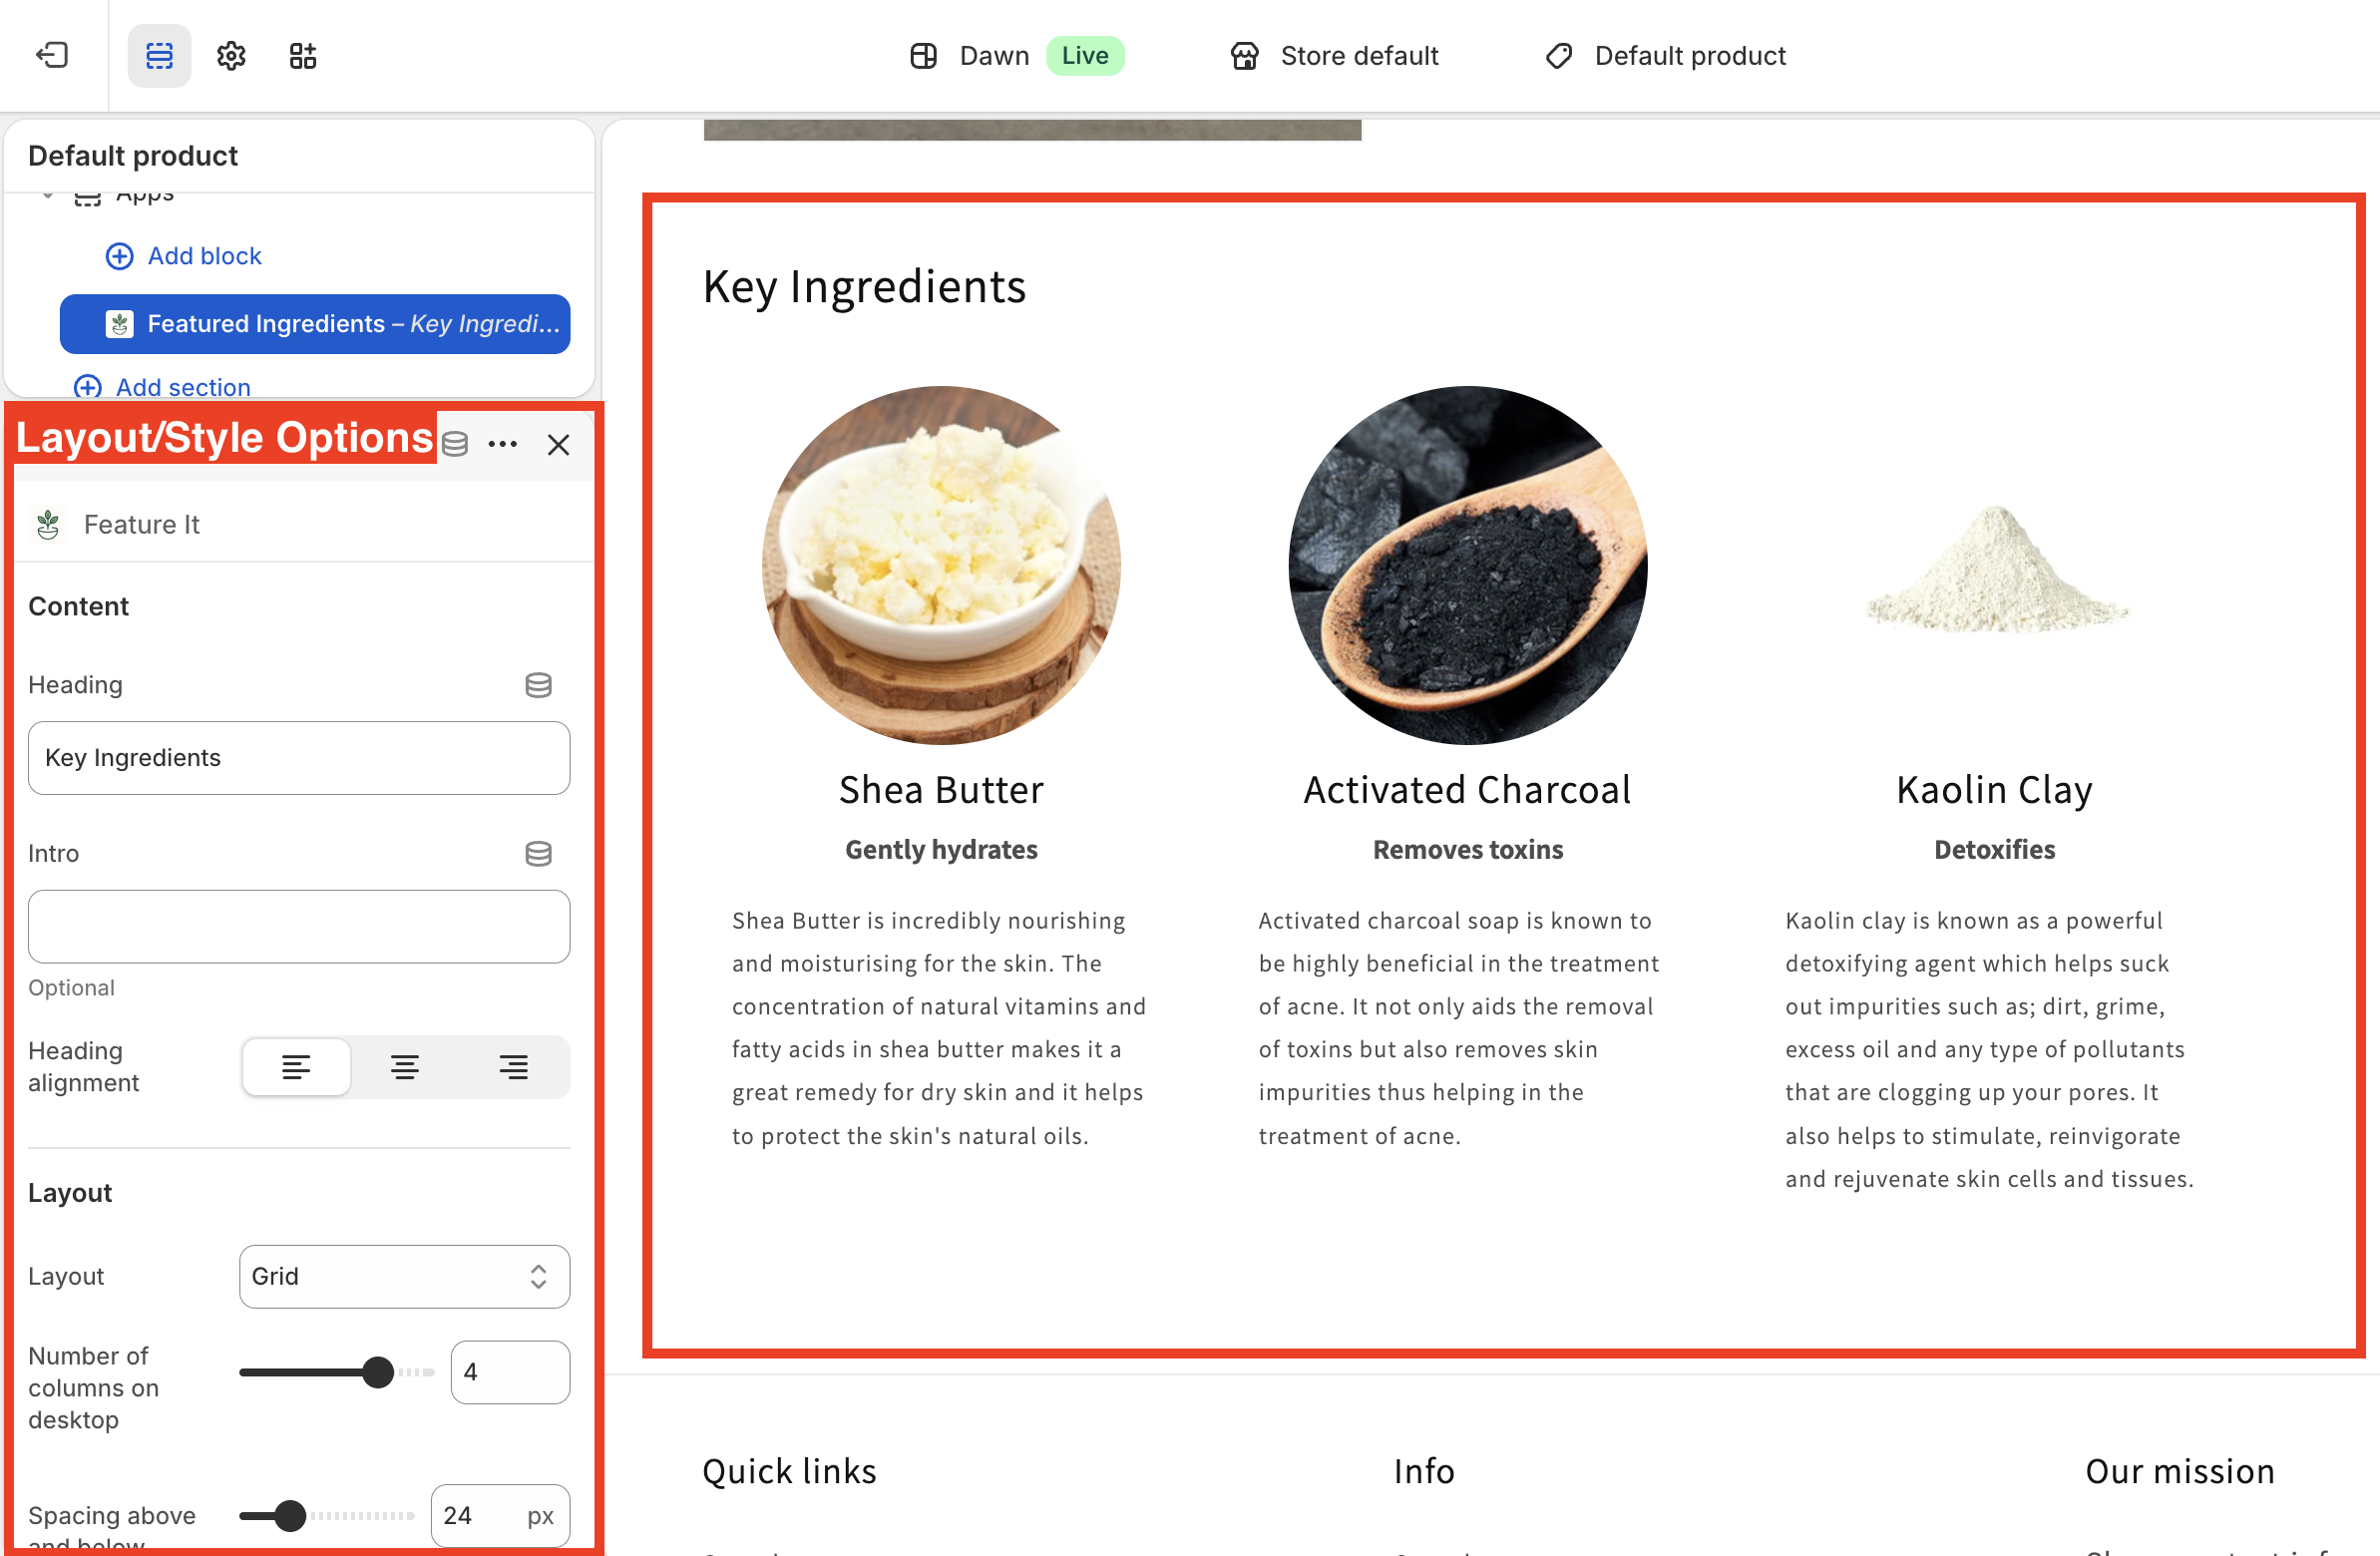
- Once you have selected a product that has ingredients assigned to it, you will see the ingredients displayed in the position you placed the block. In the left sidebar are the settings for the block. Here you can change the layout and appearance of the block. More on this in the Customizing the block guide.
Step 4 — Check your storefront
Visit one of your products on the storefront. You should see the ingredients displayed in the position you placed the block.
If ingredients aren’t showing up, check the Troubleshooting page.
That’s it! From here you can continue building out your ingredient library, assign ingredients to more products, and customise the appearance of the block in the theme editor.