Managing Your Ingredient Library
Your ingredient library is the central place where you create and maintain all the ingredients used across your store. Any ingredient you create here can be assigned to any number of products.
Adding an ingredient
- Go to the Ingredients page
- Click Add Ingredient
- Fill in the ingredient details (see field descriptions below)
- Click Save
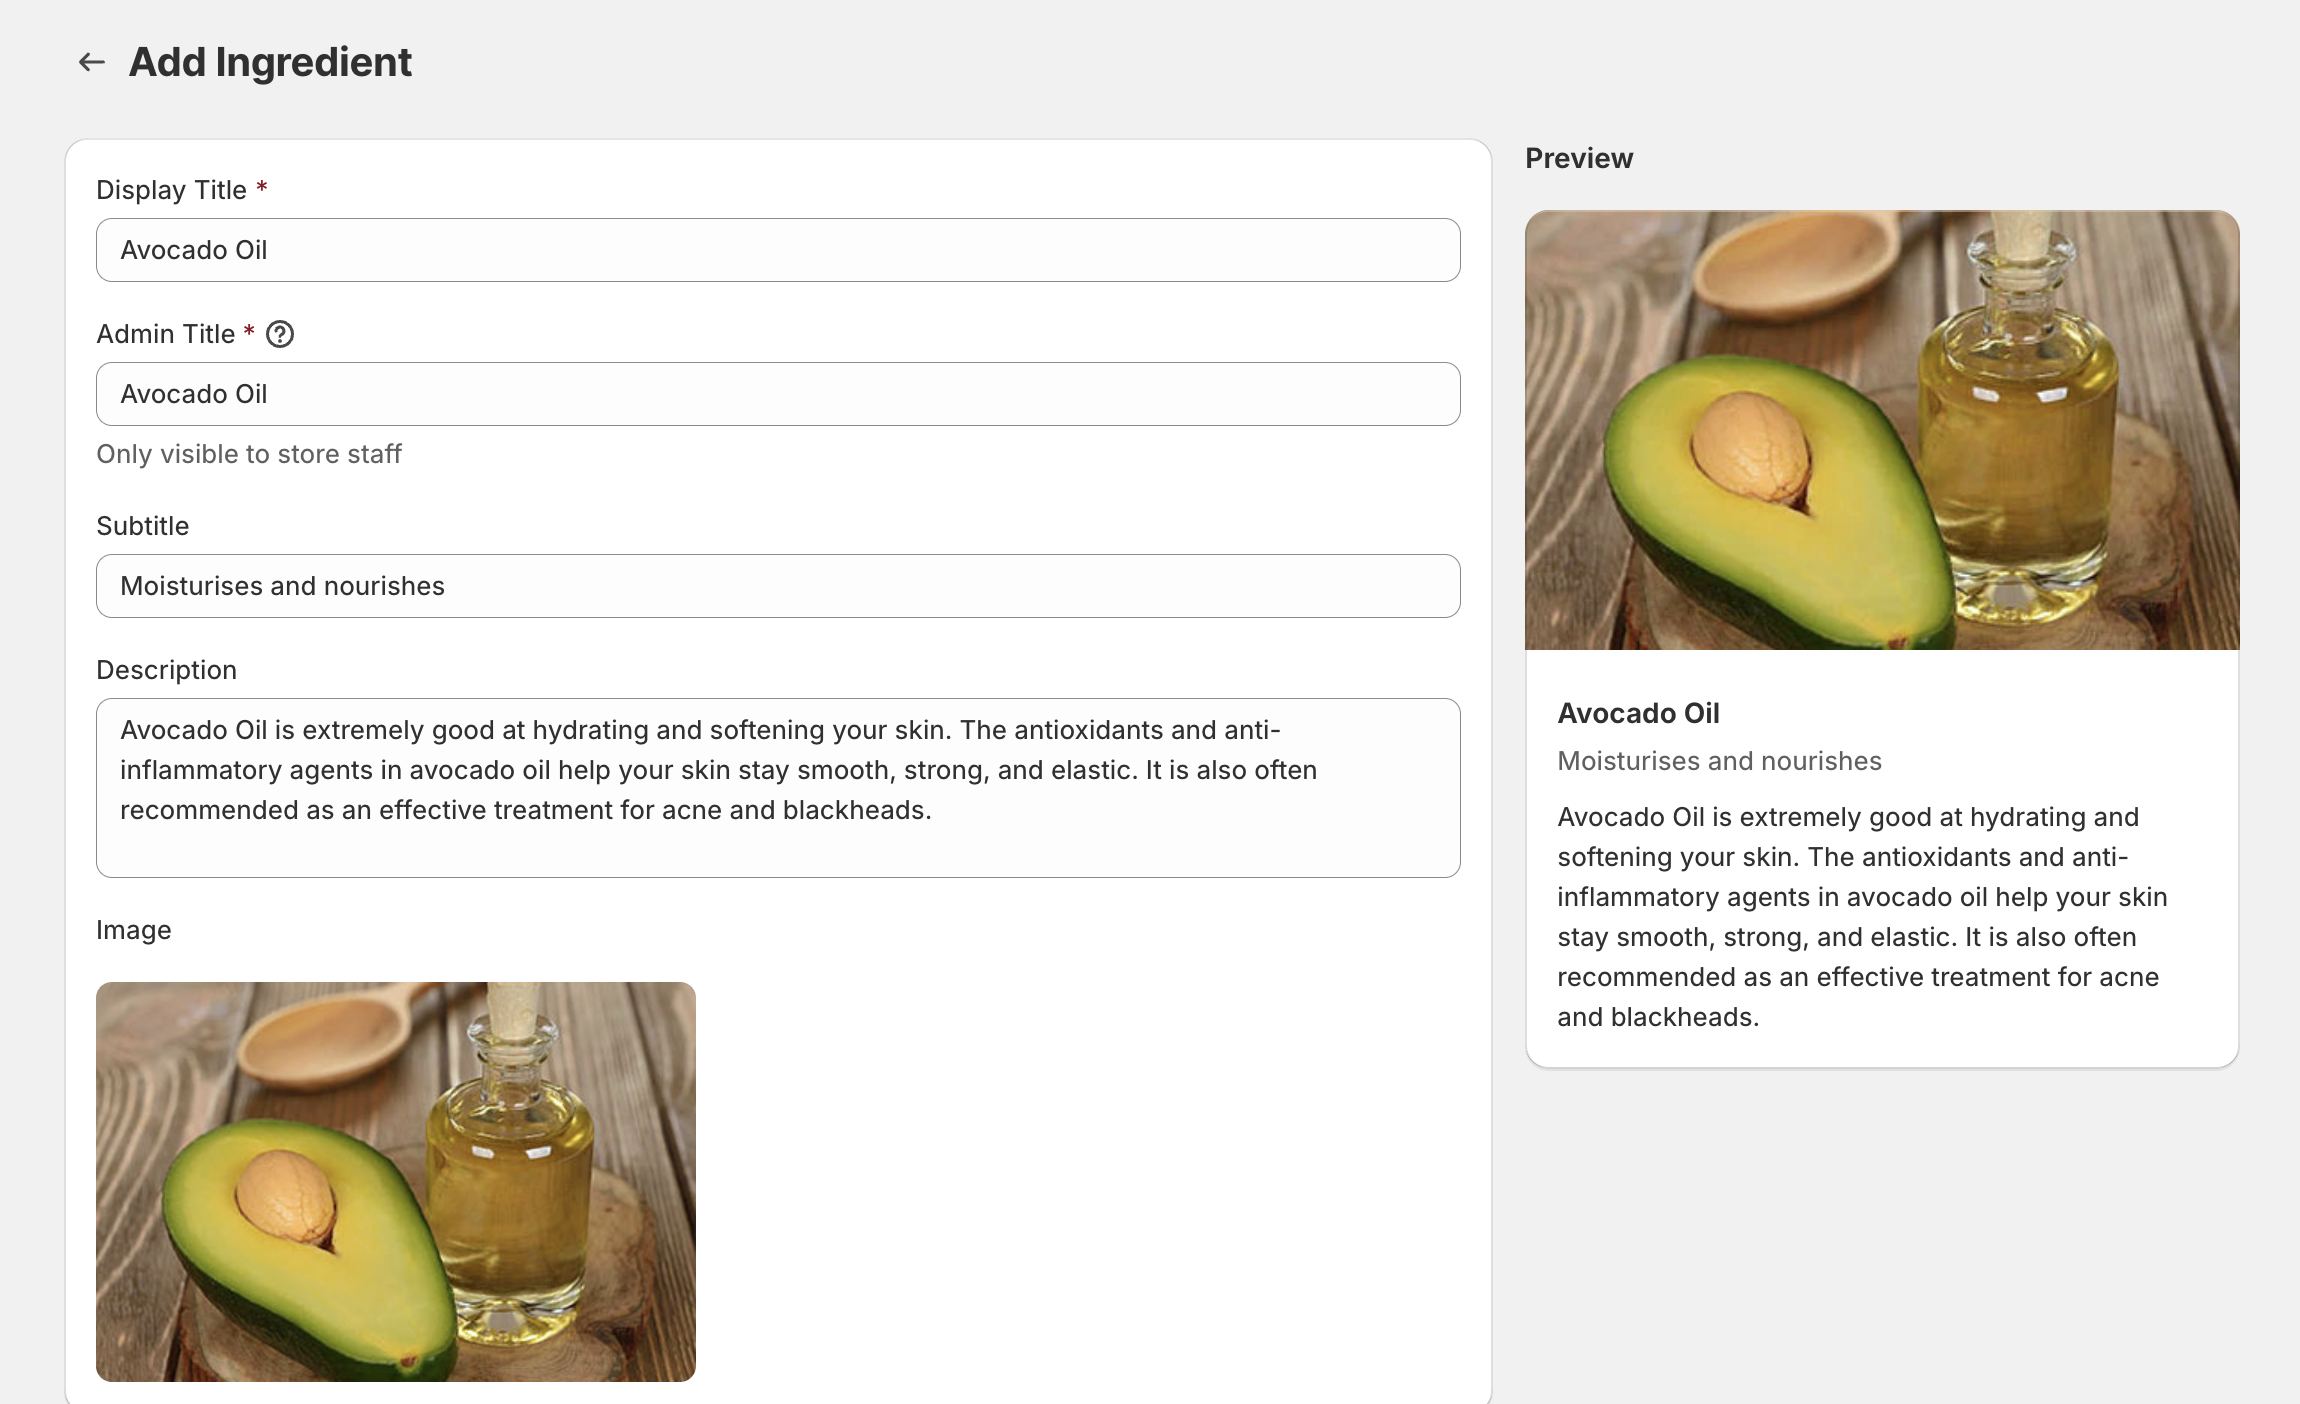
Ingredient fields
Admin Title (required) Used internally to identify the ingredient. Customers never see this — use whatever naming makes sense for you.
Display Title The name shown to customers on your storefront product pages.
Subtitle A short line of text beneath the display title. Useful for a category label or brief descriptor, such as “Moisturising Agent” or “Natural Preservative”.
Description A longer explanation of the ingredient — what it is, where it comes from, what it does. This appears in the full ingredient detail on your storefront.
Image An image representing the ingredient. Uploaded directly to your Shopify CDN. Displayed above the ingredient details on product pages.
Importing ingredients from CSV
Use CSV import when you need to add many ingredients at once instead of creating them one by one.
How to import
- Go to the Ingredients page
- Click Import CSV (top right, next to Add Ingredient)
- In the modal, use Download example.csv if you want a starter template, or prepare your own file (see format below)
- Drop your file into the upload area, or click to choose a
.csvfile - Click Import
Kernl uploads your file row by row. A progress bar shows how many rows have been processed. When import finishes, you’ll see a summary of how many ingredients were created and how many rows were skipped.
CSV import only adds ingredients to your library. To show them on the storefront, assign them to products on the Products page as usual.
Note: Import CSV is disabled if you’ve reached your plan’s ingredient limit. Upgrade or remove existing ingredients before importing more.
CSV format
Your file must be a .csv with a header row. Column names are flexible — for example, Admin Title and admin_title both work.
| Column | Required | Description |
|---|---|---|
admin_title | Yes | Internal name (same as Admin Title when adding manually). Used to detect duplicates. |
display_title | No | Customer-facing name. If empty, Kernl uses admin_title. |
subtitle | No | Short line under the display title on the storefront. |
description | No | Longer ingredient detail. Basic HTML is allowed and is sanitized on import. |
image_url | No | Public URL to an image. Kernl downloads it and stores it on your Shopify CDN. |
image_alt | No | Alt text for the image (used when image_url is set). |
Limits: up to 100 ingredient rows per file (not counting the header), and 1 MB maximum file size.
Example:
admin_title,display_title,subtitle,description,image_url
Shea Butter,Shea Butter,Moisturising agent,"Rich emollient from shea nuts.",https://example.com/shea.jpg
Vitamin C,Vitamin C,Active,"Helps brighten and even skin tone.",
Duplicates and skipped rows
Kernl skips rows instead of failing the whole import when:
- Admin title is missing
- The same admin title appears twice in the file (only the first row is imported)
- An ingredient with that admin title already exists in your library
- Your plan’s ingredient limit would be exceeded (remaining rows are skipped)
The import summary tells you how many rows were skipped. Skipped rows are not updated — to change an existing ingredient, edit it on the Ingredients page.
Images from URLs
If you include image_url, Kernl tries to import each image into Shopify after the ingredient is created. If an image cannot be imported, the ingredient is still created but without an image; the summary will mention how many image URLs failed. You can add or fix images later by editing the ingredient.
Editing an ingredient
- Go to the Ingredients page
- Find the ingredient and click Edit
- Make your changes
- Click Save
When you save an edit, Kernl automatically updates every product that uses this ingredient. You don’t need to do anything else — the changes will appear on your storefront within a few seconds regardless of how many products are affected.
Deleting an ingredient
If you delete an ingredient, it is automatically removed from all products that were using it. Their storefront ingredient displays will update accordingly.
To delete an ingredient, click Edit on the ingredient, then use the delete option at the bottom of the edit page.
Note: Deletion cannot be undone. If you think you might use the ingredient again, consider leaving it in the library and simply unassigning it from products instead.
Reordering ingredients
Ingredient order in the library is global: the same sequence is used everywhere those ingredients appear on your storefront. Change it any time on the Ingredients page using drag and drop.
How to reorder
- Go to the Ingredients page
- Click and hold the drag handle on the left of a row (six dots ⠿)
- Drag the row up or down, then release
There is no separate save button — the new order saves automatically and updates on the storefront for every product that uses those ingredients.
Tips
- Put the most important or recognisable ingredients first; they tend to stand out most on the product page.
- Per-product ingredient ordering is not available yet but is planned for a future update.